Questionnaires & the paperwork manager
Decide what patients complete before a visit and how it reaches them: the questionnaire library, the rules that assign them, and the paperwork manager.
Questionnaires & the paperwork manager
Decide what patients complete before a visit and how it reaches them: the questionnaire library, the rules that assign them, and the paperwork manager.
Two features, one pre-visit flow
Questionnaires and Previsit Paperwork are separate full-page workspaces because they answer different questions, but the patient sees them as one connected experience the day they book. Each one opens in its own tab inside Hero EMR, so you can leave it open while you work.
Questionnaires (per physician)
- Live under
Settings > Questionnaires, or underAdmin > Questionnaireswhen the practice manages them for everyone (§2.20). - Each physician (or the practice) picks which validated screeners or intake forms run for which visit types (PHQ-9 for behavioral health, ROS for new patients, etc.), or on a recurring schedule.
- The questionnaire library is shared org-wide and includes a standardized catalog plus anything your physicians have cloned and customized.
- Answers feed into the chart and can drive scoring (depression severity, fall risk, etc.).
- For minors and parent-managed teen accounts, questionnaires are delivered to the parent/guardian on file. The workspace header repeats this reminder.
Previsit Paperwork (per organization)
- Lives under
Admin > Previsit Paperwork. - Org admins build the consent, financial, telehealth, and policy documents patients sign.
- Each template has its own scope, signing cadence, content sections, and response fields.
- Each form is either Live (added to patients' visits automatically) or Off (goes out only when your staff send it).
- Changing a form's wording saves a new version, so every signed copy keeps the exact wording the patient signed.
Browse and customize the questionnaire library
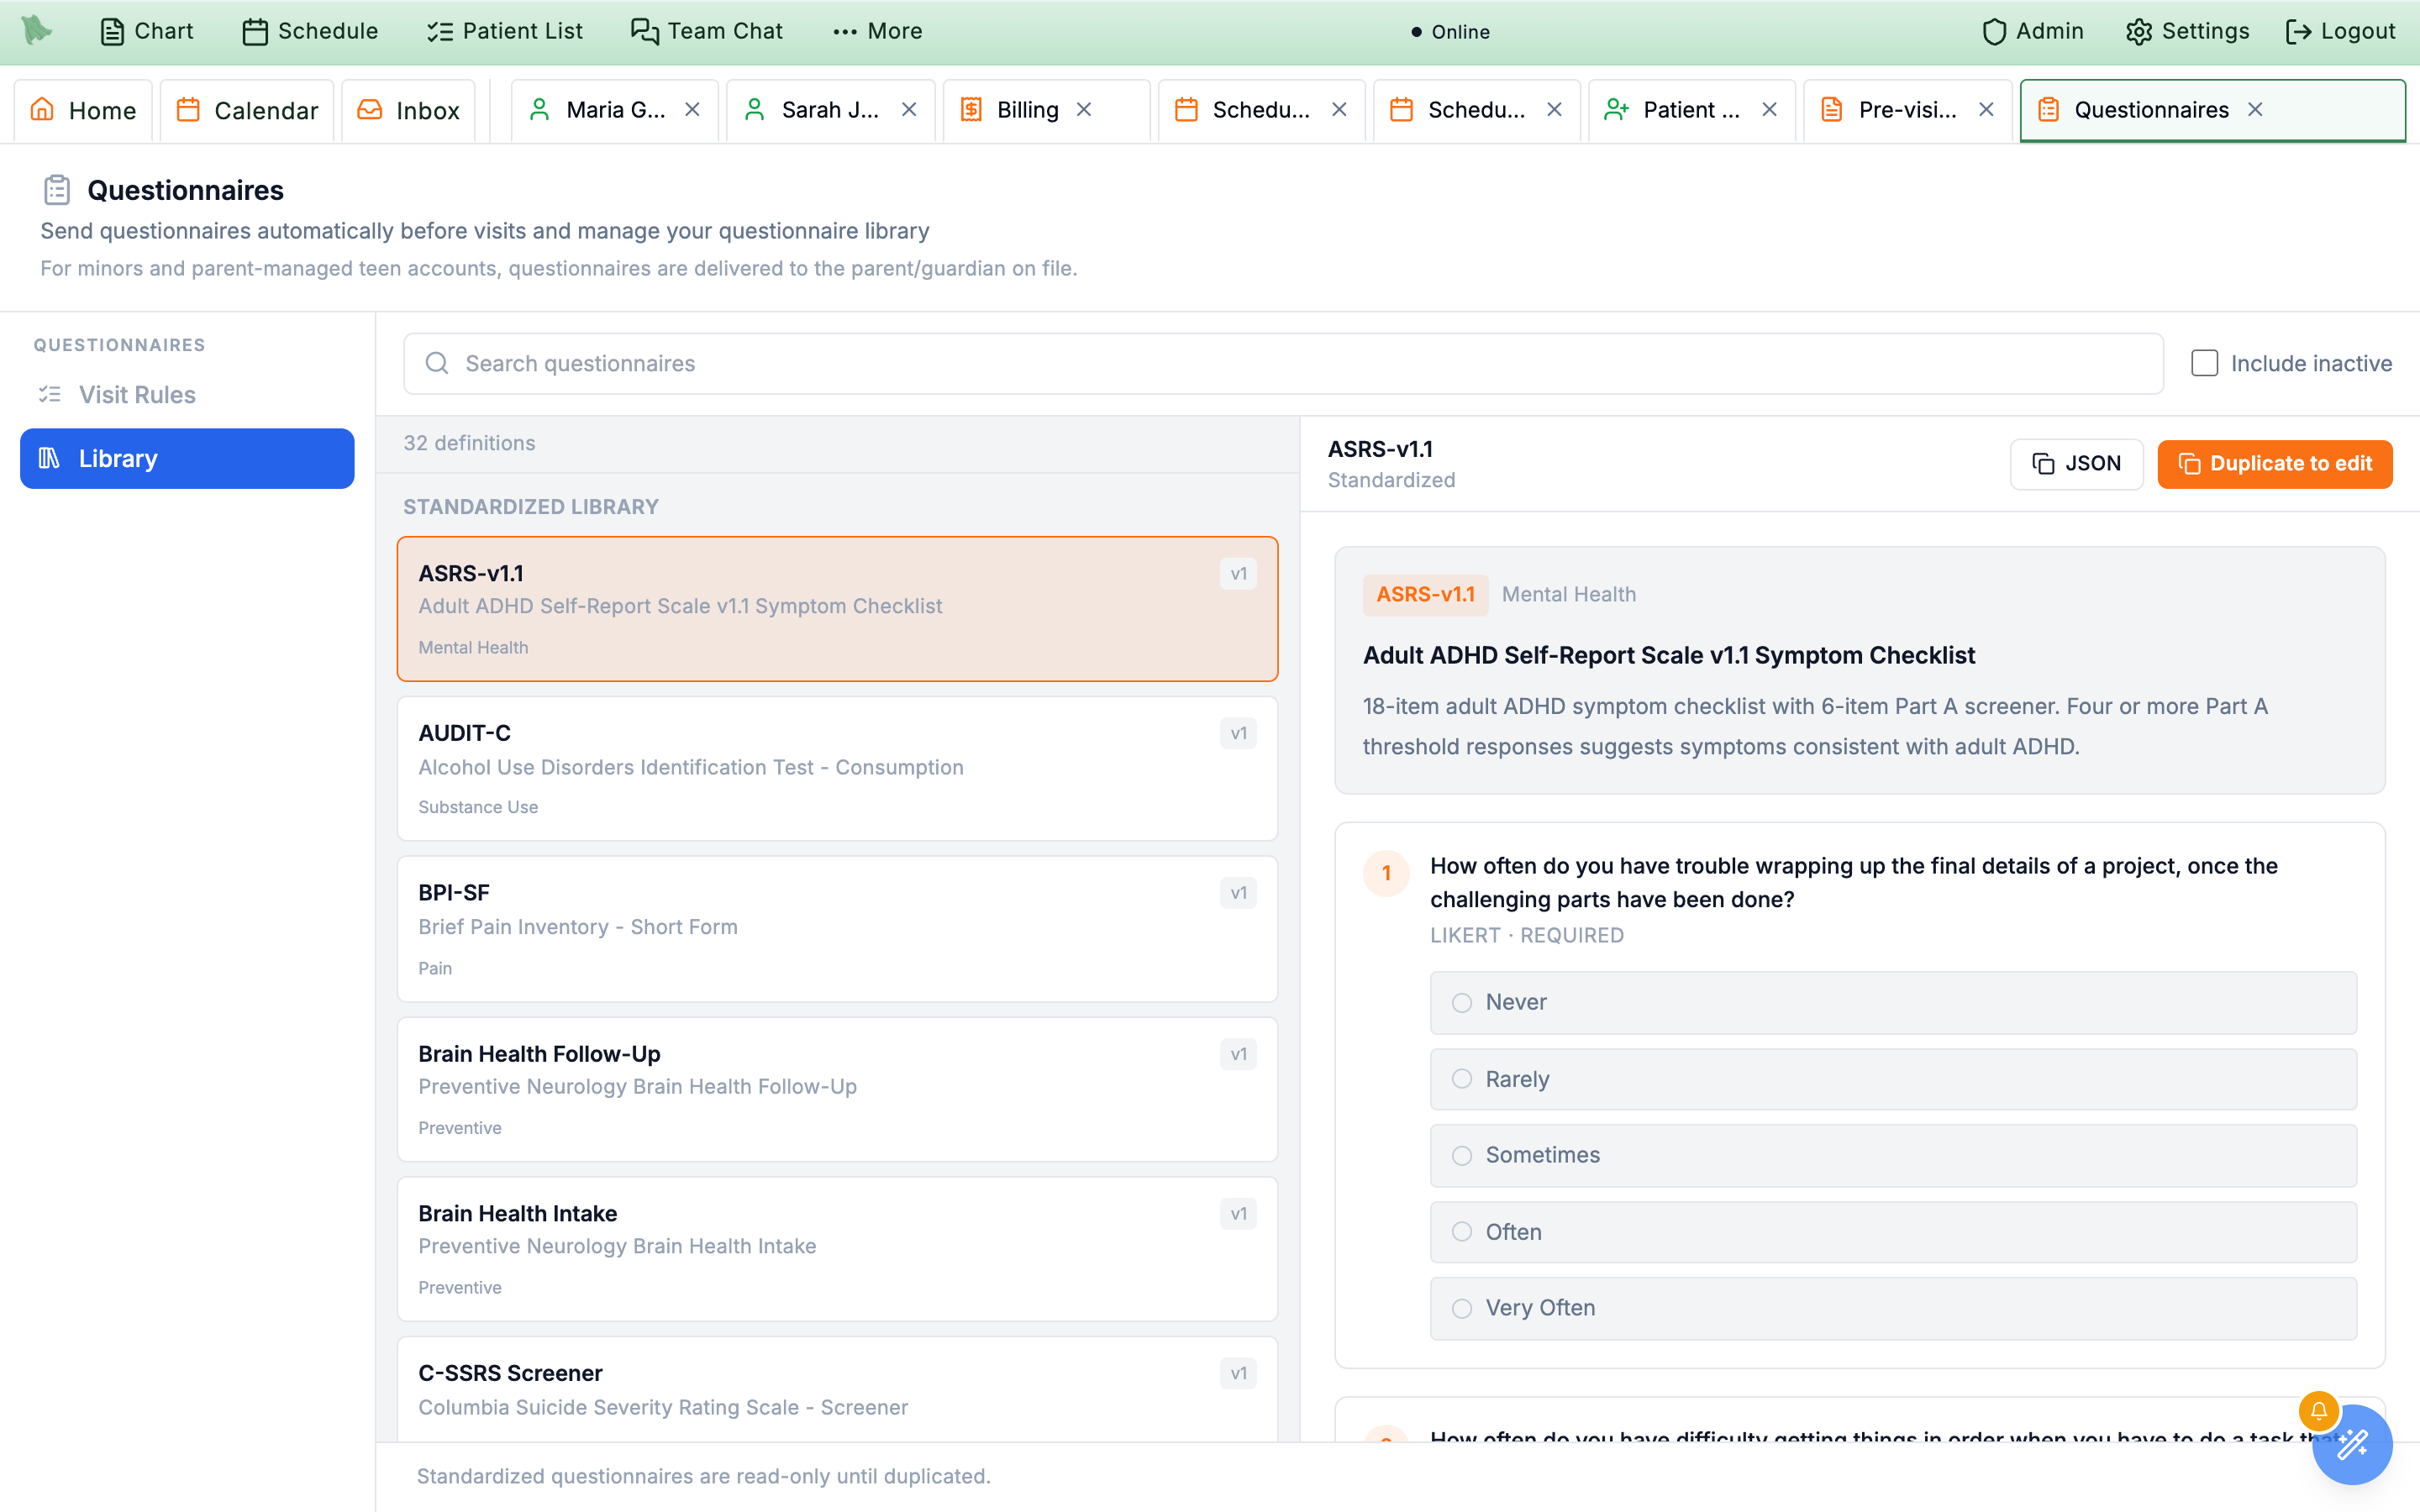
Before you assign questionnaires to visit types, decide which ones you want available. The library sidebar lists up to three groups, in this order: Your questionnaires (the current physician's personal versions), Organization questionnaires (cloned and edited by anyone in the org), and Standardized library (system-provided instruments like PHQ-9, GAD-7, AUDIT-C). Empty groups are hidden, so on a brand-new org you will only see Standardized library until something is cloned. Only items in Your questionnaires are editable; everything else must be cloned first.
- Open
Settings > Questionnaires. From the top toolbar, open Settings, then choose Questionnaires. The Questionnaires workspace opens as its own full-page tab. Its left rail has two entries — Visit Rules (selected by default) and Library. - Click Library in the left rail. The library opens with a sidebar of all available questionnaires, grouped by ownership. Use the search box or toggle Include inactive if you want to see deactivated entries.
- Preview a standardized questionnaire. Click any entry to load it in the main panel. Preview mode shows the short name, category, full question wording, response options, and required flags as the patient will see them.
- Clone before editing. Standardized and organization questionnaires are read-only. To customize one, click Duplicate to edit. The cloned copy lands in Your questionnaires and unlocks every field.
- Edit metadata and questions. Switch to Edit mode. The metadata fields are Short name, Category (depression, anxiety, mental health, substance use, trauma, pain, cognitive, functional, perinatal, developmental, preventive, or custom), Display name, Description, Estimated minutes, and Default frequency days.
- Add or reorder questions. Each question card has a type (likert, single select, multi-select, text, number, boolean, scale, score, or instruction), a required flag, the question text, and — for choice-style types — value/label pairs. Use the up/down buttons to reorder.
- Configure scoring (optional). For instruments that compute a score, paste or edit the scoring config JSON. Leave it blank for purely informational forms.
- Click Save & publish. Every save publishes a new version. The footer reminds you that in-flight assignments stay intact — patients already on an older version finish on that version, and new assignments pick up the latest.
Assign questionnaires to visit types
Rules live on the Visit Rules view. Depending on how your practice is set up, they belong either to each provider (Settings > Questionnaires) or to the practice as a whole (Admin > Questionnaires; see Practice-managed questionnaires). The editor is the same in both. A rule answers two questions: when to send (a visit is booked, on a recurring schedule, or the moment the patient registers for the portal) and which questionnaires to send. Optional filters narrow who gets them (age, sex, telehealth vs in-person, ICD-10 code on the problem list, preferred language, booking source, portal status, how far ahead the visit was booked, or when the patient was last seen).
- Open
Settings > Questionnaires(your own rules) orAdmin > Questionnaires(the practice’s), and stay on Visit Rules. Existing rules are listed on the left and the editor is on the right. If your practice manages questionnaires, a provider’s own page simply says Your practice manages questionnaire rules. - Click New to start a fresh rule, or pick an existing rule to edit. Existing rules show their status badge (Active, or Paused for a provider rule and Turned off for a practice rule), questionnaire count, and a one-line filter summary.
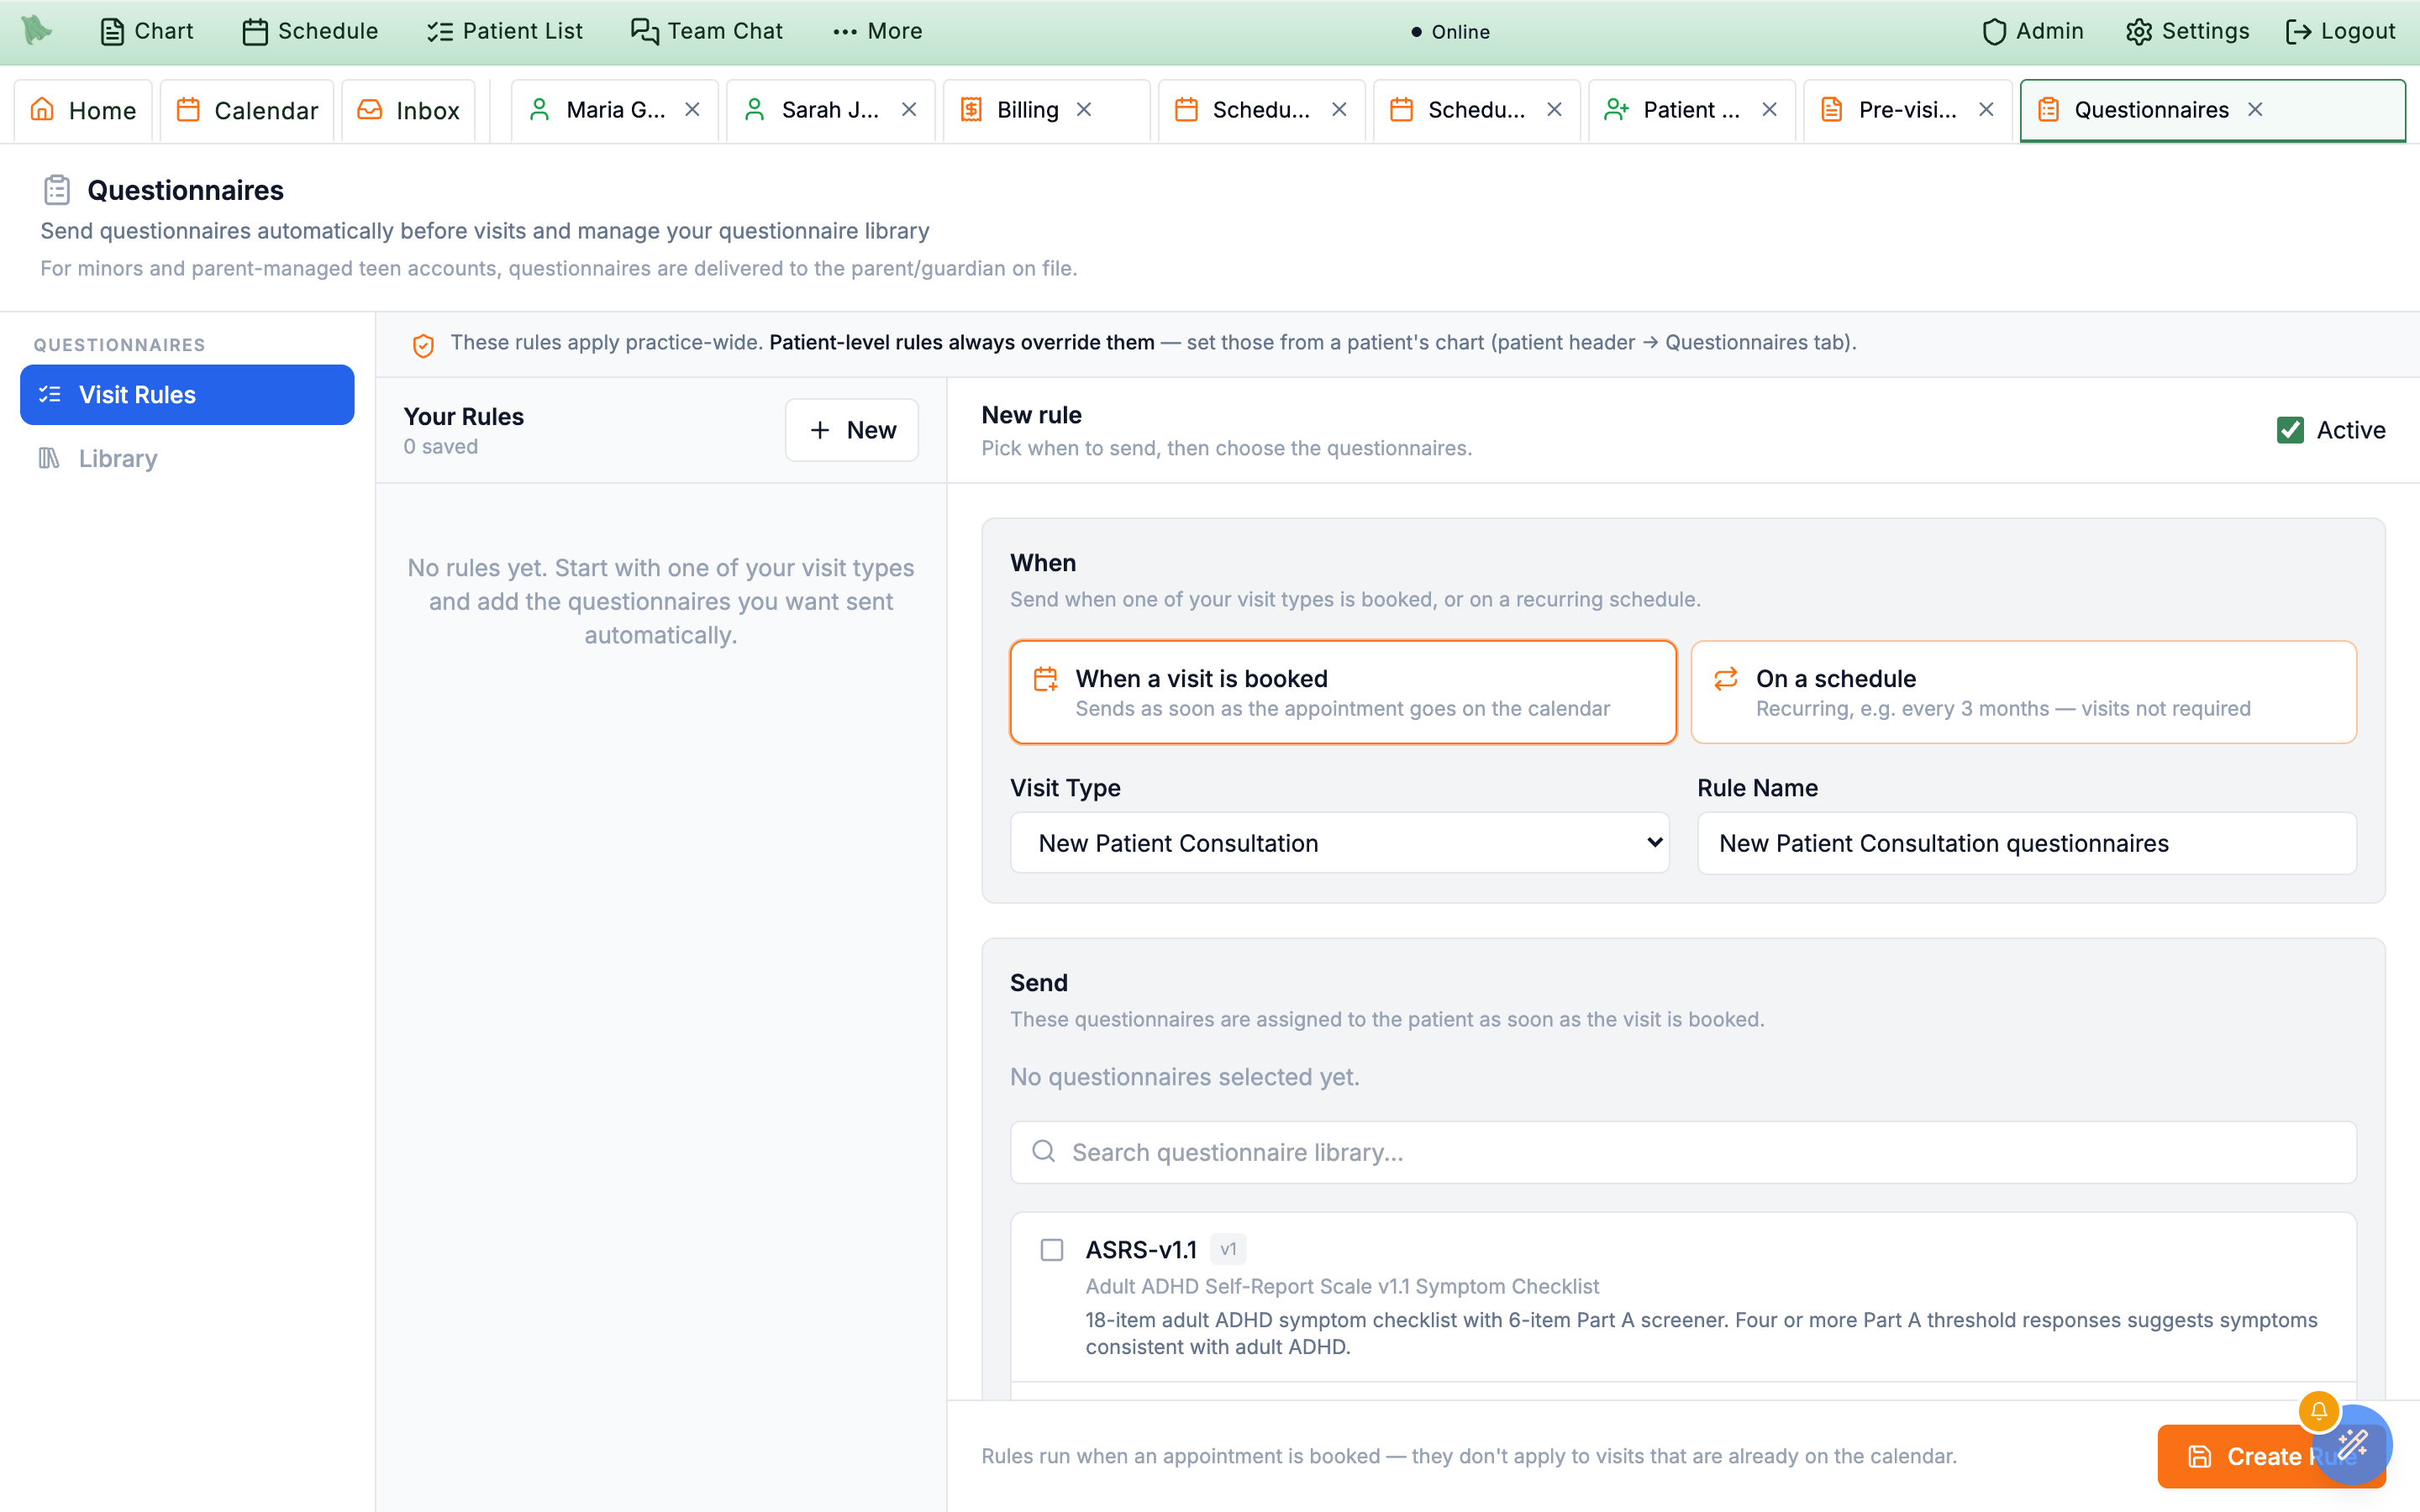
- Choose When. The When card has three choices: When a visit is booked (sends as soon as the appointment goes on the calendar), On a schedule (recurring — no visit required), and At patient registration (assigns and sends a reminder the moment the patient registers for the portal — no visit required). Pick When a visit is booked for the classic visit-type rule.
- Tick the Visit types and give the rule a Rule Name. Visit types is a list of checkboxes: "Sends when any checked visit type is booked." Tick every type that should get these questionnaires (for example all of your intake types) and use the age limits to pick adult or child forms. In
Admin > Questionnairesthe list shows the practice’s visit type names. A type that is no longer active reads "…" is not an active visit type anymore. with Remove it. Name the rule something you will recognize later (for example, "New patient intake questionnaires"). Set up visit types first if the list is empty. - Pick the questionnaires. Use Search questionnaire library... and check off the screeners you want. Selected items appear as removable pills at the top of the Send card. A practice rule can only send questionnaires that are available to the whole practice.
- Choose whether to message the patient. On a booking rule, Also text or email the patient a link right away starts off: the appointment reminders before the visit already ask the patient to complete them (one message per booking, however many questionnaires). On a scheduled rule, Text or email the patient a link when these are sent starts on and is recommended, because a scheduled send has no visit and no reminder mentions it (one message per patient, quiet hours respected; a parent gets it for a minor).
- Optionally skip repeats. On a booking rule, Skip a questionnaire the patient completed in the last … days (blank = Off, up to 3,650) leaves out a questionnaire done recently, and also one still waiting to be filled out from an earlier booking.
- Add optional filters under Only if (optional). Leave them blank to send for every booking of these visit types. Or narrow with any combination of: Minimum Age / Maximum Age, Visit Mode (Any / Telehealth only / In-person only), Only if booked within … days of the visit, Patient Sex (Female, Male, Other), Portal Status (Registered, Invited, not registered yet, Not invited), Preferred Languages, Booking Sources, and Problem List ICD-10 Codes. A scheduled rule also offers Only patients seen in the last … days (see below).
- Leave the Active checkbox on (or clear it to pause). It sits in the editor header row beside the rule name, not down with the filters. Pausing keeps the rule definition but stops new patients from triggering it.
- Click Create Rule (or Save Rule if editing). The footer explains when booking rules run: "Rules run when an appointment is booked, and again if its visit type, provider or time changes (questionnaires the visit no longer needs are withdrawn unless the patient started them). Visits already on the calendar before a rule is saved are not updated." To see what a rule actually did for one patient, open that patient’s Questionnaires tab and expand Why questionnaires were or weren't sent.
Admin > Questionnaires, a practice rule instead lists each visit type where pre-visit intake is off and at how many providers, with a Send even when pre-visit intake is off button that changes this for every questionnaire rule in the practice. The other two triggers never touch a visit type, so this check does not apply to them.
Recurring (scheduled) rules
Choose On a schedule in the When card when a questionnaire should recur on a cadence rather than ride along with an appointment — periodic PHQ-9 monitoring, an annual functional screener, a quarterly medication-adherence check.
- Click On a schedule. The description reads "Recurring, e.g. every 3 months — visits not required."
- Pick an interval. Four presets are offered — Monthly, Every 3 months, Every 6 months, and Yearly — or type your own value in the Every <n> days box. Custom intervals must be a whole number of days between 1 and 1095.
- Pick the questionnaires and save. A daily sweep evaluates scheduled rules across every active patient in the organization; there is no appointment involved, so patients receive the questionnaire whether or not they have anything booked.
- Limit it to patients you actually see. Only patients seen in the last … days (for example 180) skips people with no recent care: "Seen = checked in for a visit or has a finished note in that time. Leave blank to include every active patient, including people not seen in years."
Rules that fire at patient registration
Choose At patient registration when your intake screeners should reach a new patient the moment they get portal access, before anything is on the calendar. The choice describes itself: "Assign and send a reminder the moment the patient registers for the portal — no visit required."
- Click At patient registration. The Visit Type field disappears — a registration has no appointment to match against — and Rule Name widens to fill the row. Leave the name blank and Hero EMR saves the rule as New patient registration questionnaires.
- Pick the questionnaires. The Send card states what the patient will get: "These questionnaires are assigned as soon as the patient registers for the portal, and the patient gets one reminder listing them together with any registration paperwork."
- Narrow with patient filters if you want to. Minimum Age, Maximum Age, Patient Sex, Preferred Languages, and Problem List ICD-10 Codes still apply. Leave them blank to include every patient who registers.
- Save. The rule reads At patient registration in the rule list, and the editor footer repeats the one thing to remember: "Registration rules run when a patient completes portal registration — they don't apply to patients who are already registered."
Admin > Patient Registration. It happens once per patient: a second account linked to the same chart (a parent or caregiver, say) does not re-send anything. Patients who already had portal access when you switched the rule on are not back-filled — send those from the patient's chart with Send a questionnaire on the patient header's Questionnaires tab.
Visit Mode
Limit a rule to telehealth-only or in-person-only visits. Leave on Any for both. Booking rules only.
Only if booked within … days of the visit
A maximum, not a minimum, checked when the visit is booked: "a visit booked further ahead than this gets nothing. It does not send the questionnaires later." Saved rules read back as Within <n> days. Set it to 7 and a visit booked 30 days out never triggers the rule — use it for last-minute screeners, not for ones that need lead time. Booking rules only.
Portal Status
Restrict to Registered, Invited, not registered yet, or Not invited portal patients. Most rules leave this blank, and registration rules do not offer it at all.
ICD-10 Codes
Comma-separated codes that must appear on the problem list — e.g. F32.1, F41.1 for depression/anxiety screening.
Preferred Languages
Two-letter codes (e.g. en, es). Useful when you have language-specific instrument versions.
Booking Sources
Limit by the origin Hero EMR recorded on the booking. The canonical values are emr, patient_api, website, mobile_app, phone_agent, voice_agent, physician_api, admin_api, followup_workflow, and waitlist_claim. The match is exact (case-insensitive), so a made-up value like online silently makes the rule never fire. Booking rules only.
Intake worklist where an intake coordinator, MA, or nurse marks them reviewed, flags them for the provider, or sends them back to the patient.
Subscales in their response views. Read each available cutoff or criteria result and any incomplete-answer information alongside the total. See Reading a questionnaire card.Open the Previsit Paperwork manager
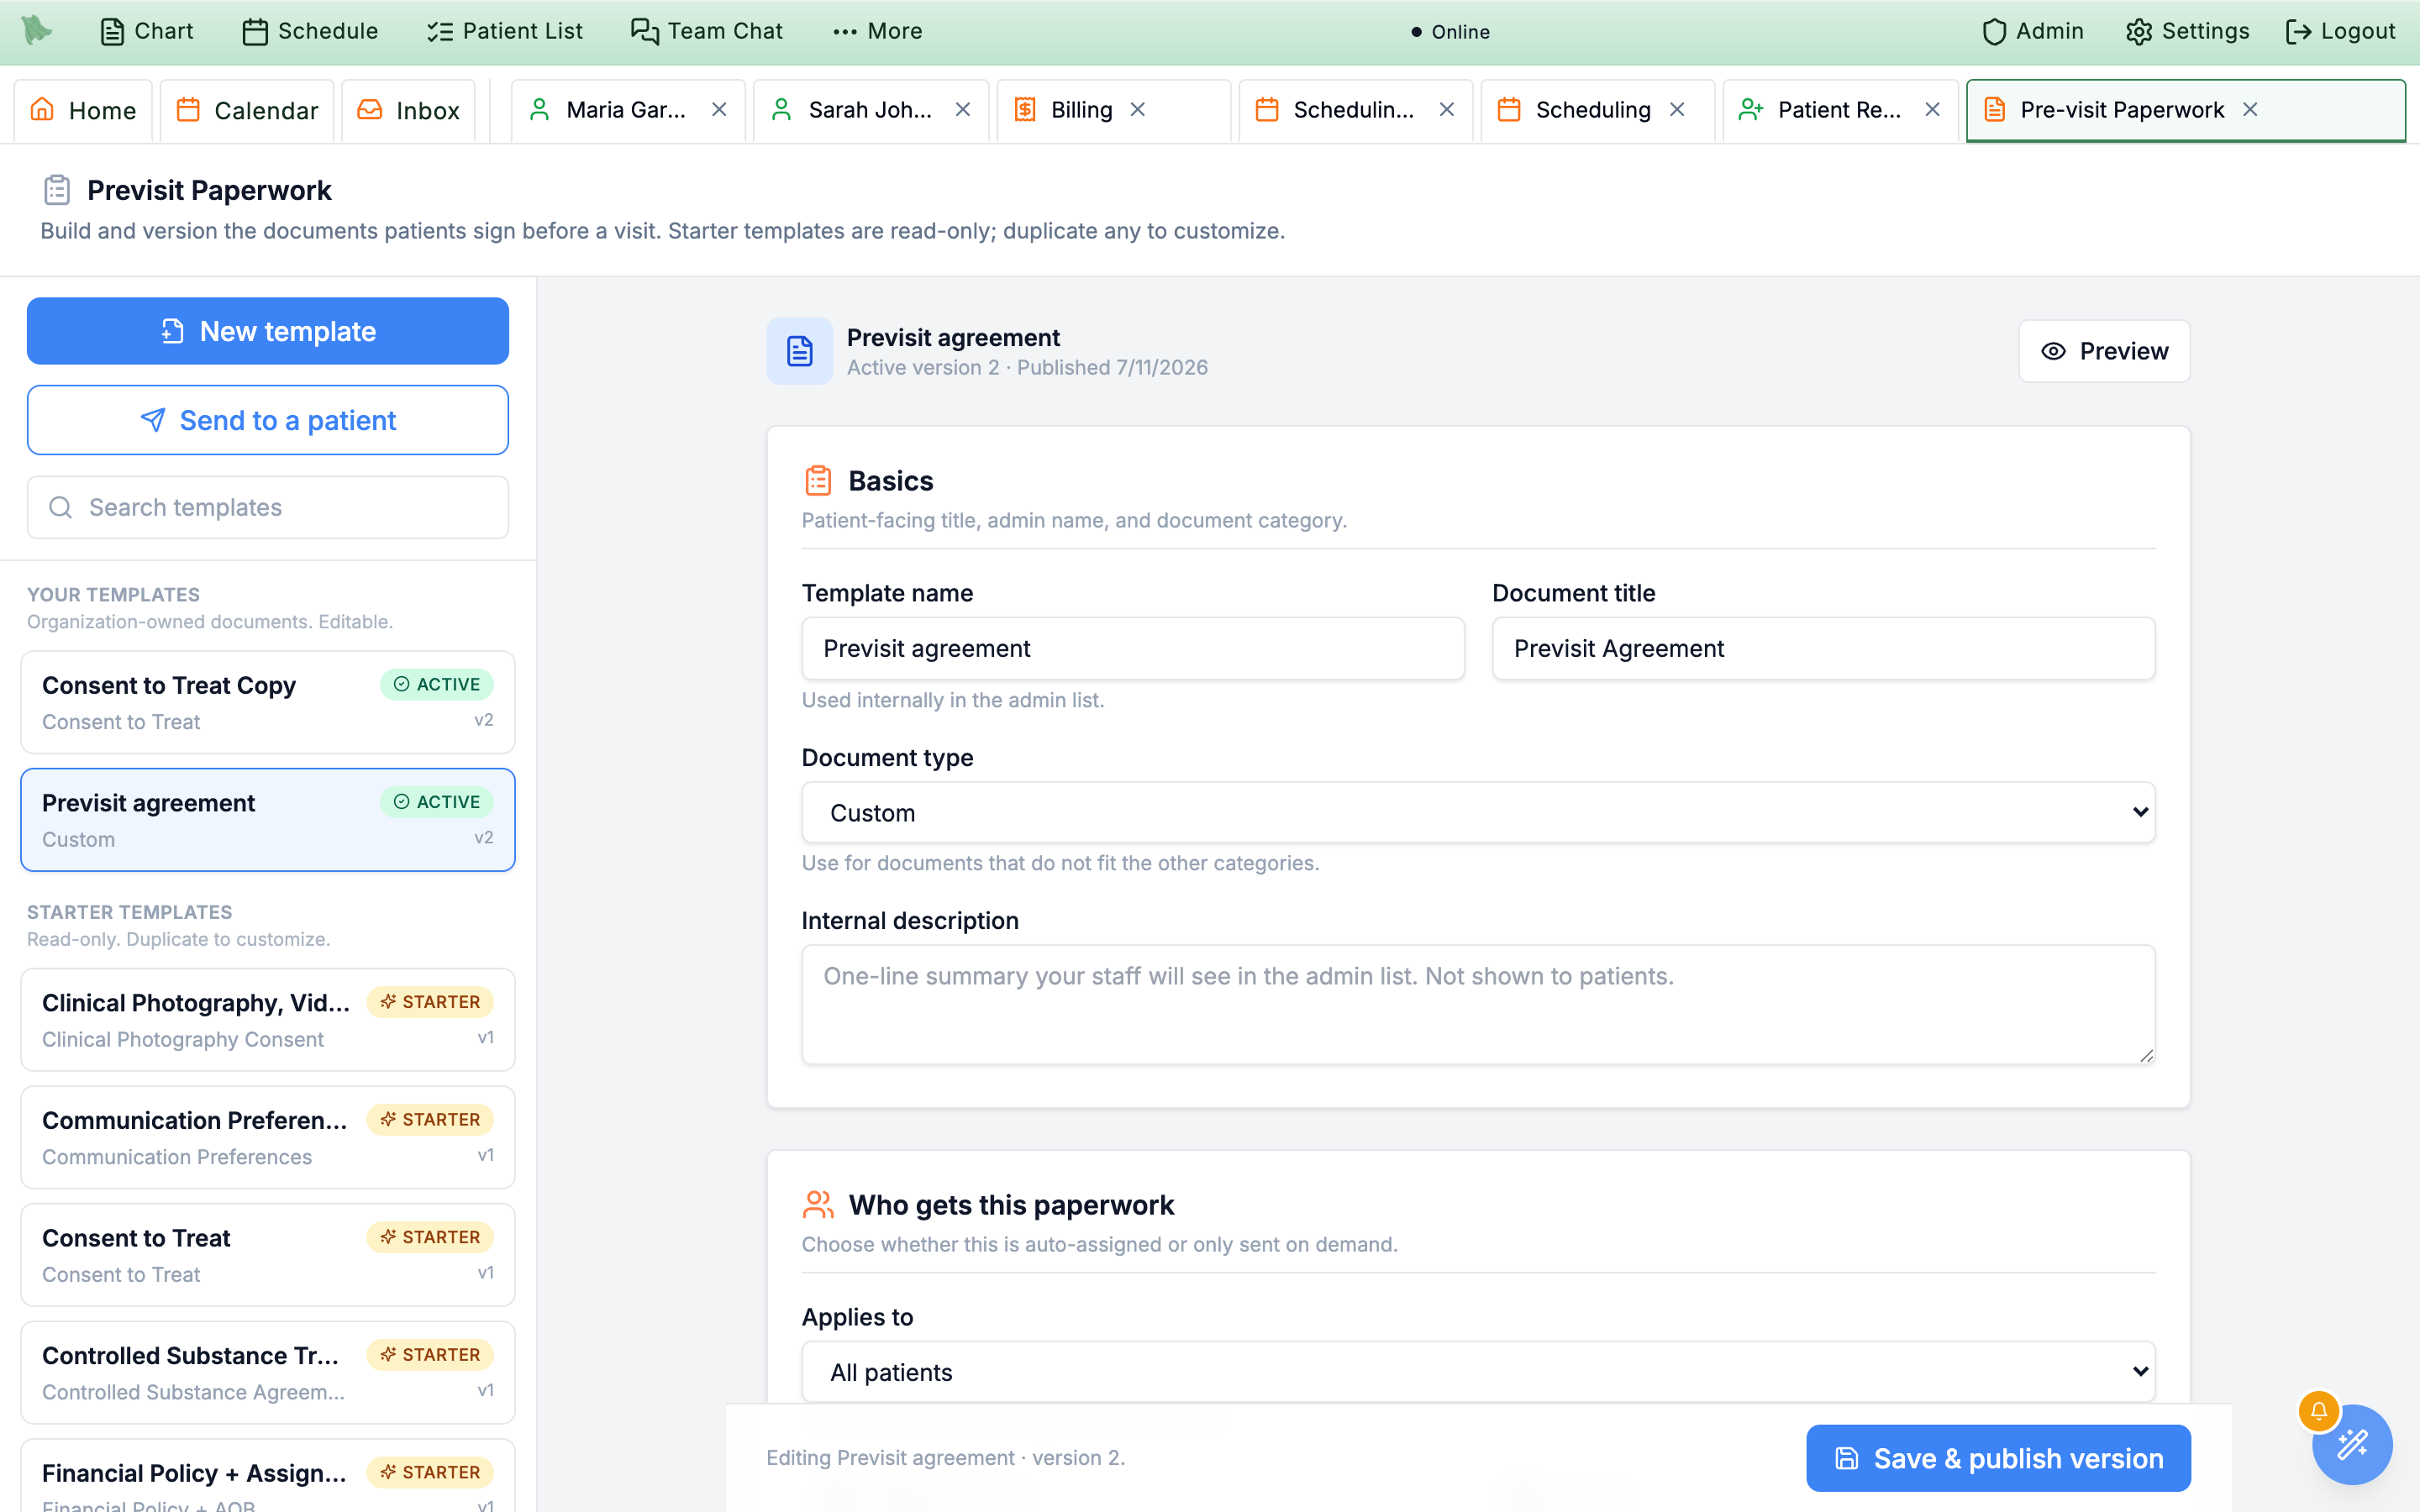
Previsit Paperwork is org-wide. One admin builds the consent forms, financial policies, and other documents patients sign, and every physician in the organization shares them. Hero EMR ships with a set of read-only starter templates you can duplicate as a starting point. The header of the workspace sums up the one rule to remember: "A form goes out automatically only while it's Live; an Off form goes out only when your staff send it."
- Sign in as an org admin or an office manager. Building and managing templates needs administrator access or the templates permission, which office managers have. For everyone else the Previsit Paperwork entry is not shown in the Admin menu, and the underlying template list refuses the request even if the page is reached directly. There is no read-only mode. Sending a form does not need this page: front-desk staff with patient-management permission use
Send a formon the patient’s Questionnaires tab or in a visit’sDetails. - Open
Admin > Previsit Paperwork. The Previsit Paperwork workspace opens as its own full-page tab, with a sidebar of templates and a large editor pane. The sidebar splits into Your templates (org-owned, editable) and Starter templates (read-only, duplicate to customize). Until you pick a template, the editor pane shows How it works in three steps: Pick a form, Choose who gets it, Turn it on. - Read the Live and Off pills. Each of your templates carries a green Live pill (with a pulsing dot) or a gray Off pill. The line under its name says who gets it while it's Live, such as "Every visit", "New patients", or "Every telehealth visit + portal sign-up", or reads "Not sent automatically" when it's Off. The Your templates heading counts them, for example "3 live · 2 off". Whenever any form is Off, an amber callout at the top of the list says so: "2 forms are off. Patients only get them when your staff send them. Open a form and click Turn on to send it automatically." Starters show a Starter badge and their document type instead.
- Browse the starter templates. Hero EMR includes vetted starters for HIPAA NPP, consent to treat, financial policy + AOB, telehealth consent, no-show / cancellation policy, photography consent, ROI authorization, controlled substance agreement, and more.
- Pick a starting point. Click any starter and use Duplicate to edit to copy it into Your templates, or click New template to start from a blank slate. A duplicate always arrives Off, and the banner says so: "It's off for now, so no patient gets it yet. Review the wording, then click Turn on at the top." It assigns nothing to anybody until you click Turn on (§2.6).
- Send a form on demand with Send to a patient. The sidebar's second button opens Send a form ("The patient signs it in the portal. No appointment needed."). Search the Patient by name, phone, MRN, or DOB, choose the Form, and click Send form; Hero confirms Sent "{form}" to {patient}. They will find it in the portal under Forms to sign. and offers Send another form. It lands in the patient's Forms to sign queue with no appointment attached. A chart with no date of birth can't sign forms in the portal, and the window says so. Sending by hand works whether a form is Live or Off; Off forms are listed with "(sent on request only)" after their name. Forms can also be ordered from inside an encounter so they show up alongside that visit's other orders.
Manage questionnaires for the whole practice, and the youth screeners
Admin > Questionnaires (under Patient-facing) is the practice’s version of each provider’s Settings > Questionnaires: "Send questionnaires automatically and manage the practice's questionnaire library." Practice administrators and owners can open it, and so can staff with the templates permission (office managers have it). Its left rail has Visit Rules, Library, and Advanced (campaigns, simulator, previsit-bot settings, and activity).
Who sets the visit rules: Defer to individual providers?
- Choose Yes or No. "Yes: each provider sets this in their own Settings → Questionnaires. No: the practice sets it here for everyone, and providers don't see these options." Practices that were already using Hero before this choice existed start on Yes; new practices start practice-managed (No).
- Read the consequence before saving. Switching to No says how many provider rules will be paused: "… provider rules will be paused while the practice manages questionnaires. Switching back restores them."
- Click Save questionnaire settings. It confirms Questionnaire settings saved.
- Practice-managed (No). Practice rules run for every provider’s visits, on every trigger. Providers’ own rules are listed under the rule form (Providers' own rules (N) — paused while the practice manages questionnaires); Use for the whole practice turns one into a practice rule. Removing a practice rule is Deactivate Rule; questionnaires already assigned stay in patients’ charts.
- Deferring to providers (Yes). Booking rules are set by each provider ("Rules that run when a visit is booked are set by each provider while 'Defer to individual providers?' is Yes."), and a booking rule the practice made earlier shows "This booking rule is paused while providers manage their own visit rules."
- Rules with advanced conditions (made in Advanced) are shown read-only in the editor with Open Advanced.
The practice library
In Library, a questionnaire one person built reads Personal — practice rules can't send it until an administrator clicks Make available to the practice; it then reads Practice. Remove from the practice asks "Remove from the practice? Rules can no longer send it." and is refused while an active rule, an open campaign or a recurring enrollment still sends it, so nobody’s automation changes silently.
Youth screeners: DASS-Y and PHQ-A
Two youth screeners are in the standardized library for every practice, ready to add to a rule (use the age limits to send them only to young patients):
| Questionnaire | Ages | Scoring |
|---|---|---|
DASS-Y — Depression Anxiety and Stress Scale - Youth | 8–17 | 21 items about the past week, answered from Not true to Very true. Depression, Anxiety and Stress subscales, each banded Normal, Mild, Moderate, Severe, Extremely severe; total 0–63. |
PHQ-A — PHQ-9 Modified for Adolescents | 11–17 | Nine items about the past two weeks, scored 0–27 with the PHQ-9 bands (Minimal depression to Severe depression), plus four unscored extra questions. Any answer above zero on item 9, or Yes to either safety question, raises the same safety flag as the PHQ-9: a chart alert, safety to-dos, and crisis help in the portal. |
Patients see each standardized questionnaire’s own time frame above its questions (for example "During the past two weeks, how often have you been bothered by:"). Patient lists can find patients by their latest PHQ-A or DASS-Y result (see Custom search builder).
Need help? Email support@heroemr.com.